Campaigns are a super useful tool in Salesforce, especially for nonprofit organizations looking to track their marketing and fundraising efforts, attendance to events or even programmatic offerings. However, creating and using a campaign is just the beginning.
The whole point of creating a campaign is to track its impact and how do we do that? With tracking its Campaign Members and Campaign Member Responses! Standardizing Campaign Member Status’s or responses is key to consistently measuring the impact of the types of campaigns you hold.
But did you ever notice that there are only two default Campaign Member Status values available to you?
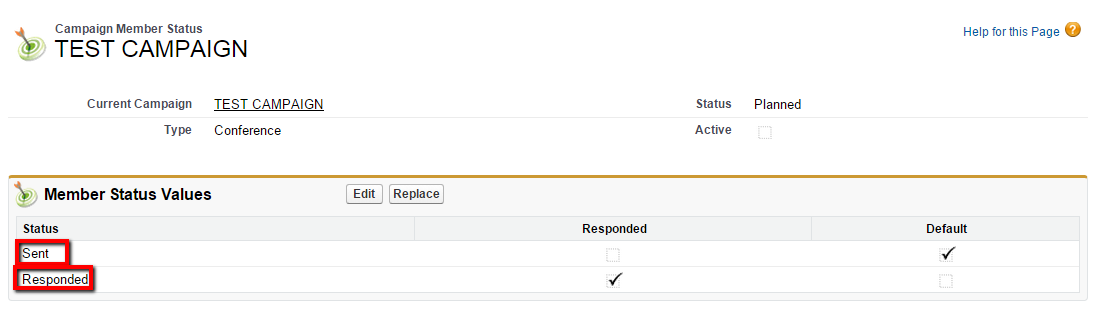
Sent and Responded are the two campaign status’s that are generic to every campaign.
And although you can edit them by pressing the “Advance Setup” button on your Campaign Record, it only applies for that campaign and that campaign only. This create a lot of work if you want to use the same Campaign Member status’s for every campaign type, which is vital for consistent and effective reporting.

To combat this problem and save you loads of time we’re introducing AAKonsult, a cool app that allows you to set up a list of default Campaign Member Status values based on Campaign Type that will automatically be assigned every time you create a new campaign.
You may ask what are some examples where I could use different Campaign Member Status values. Well, here are a few examples where this app might be helpful:
- Event Attendance Status’s- Invited, Accepted, Cancelled, Attended, No Show
- Class Enrollment- Enrolled, Dropped
- Webinar- Invited, Registered, Attended, Did not Attended, Watched Recording
Installing the App
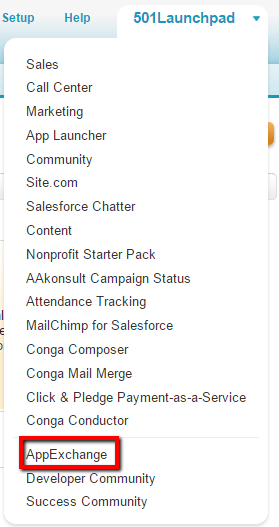
From your Salesforce Instance, go to the upper right corner app menu and scroll down and select “AppExchange.”
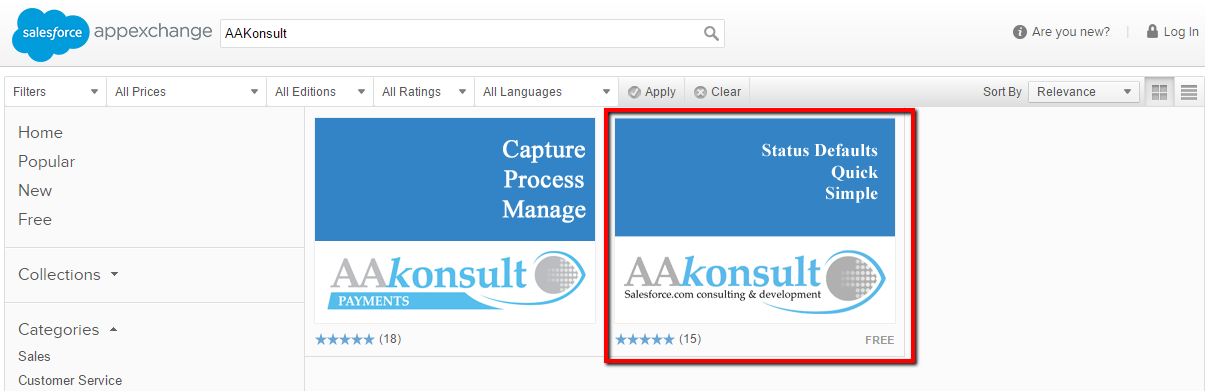
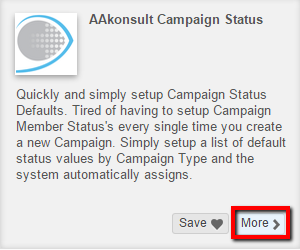
Search for “AAKonsult” and select “Status Defaults Quick Simple.”
And then select “more.”
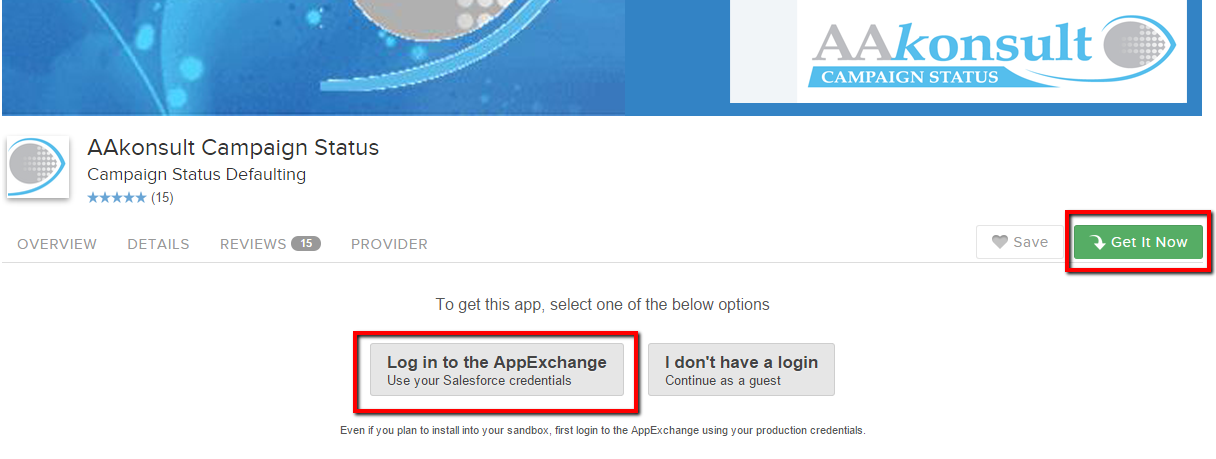
Select “Get it Now” and then “Log into the AppExchange”
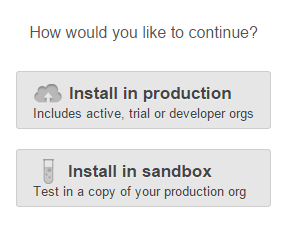
And chose whether you’d like to install in your Production or Sandbox.
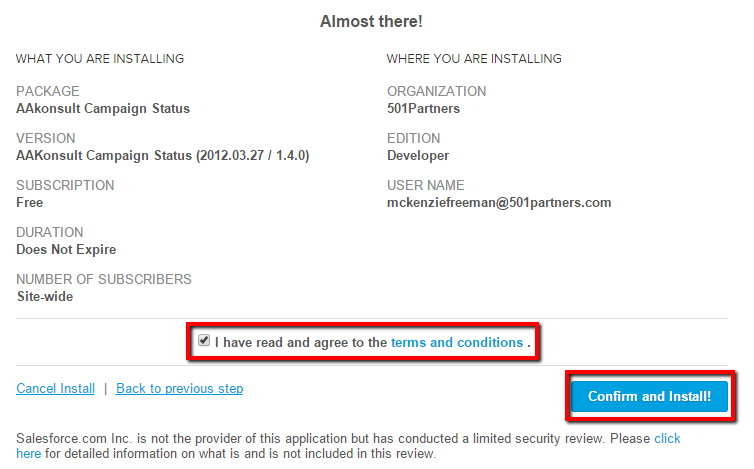
Check “I have read and agree the Terms and Conditions” checkbox and then “Confirm and Install.”
You will be asked to log back in to your Salesforce Instance and will be brought to the AAKonsult App. Select “Install for All Users.”
You should also receive a confirmation email.

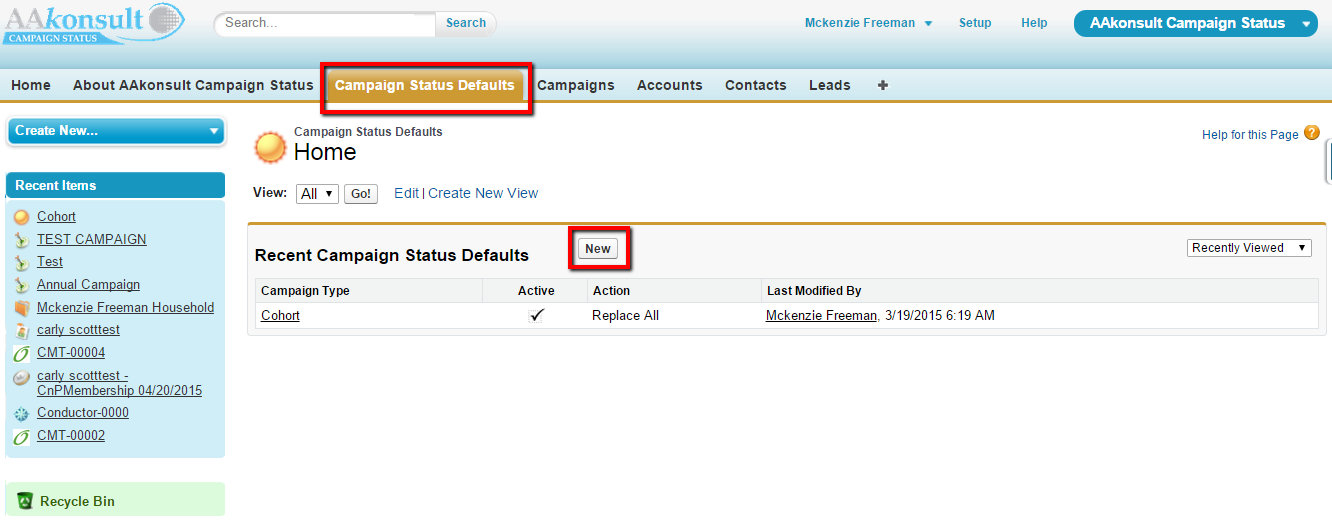
Navigate to “Campus Status Defaults” and select “New.”
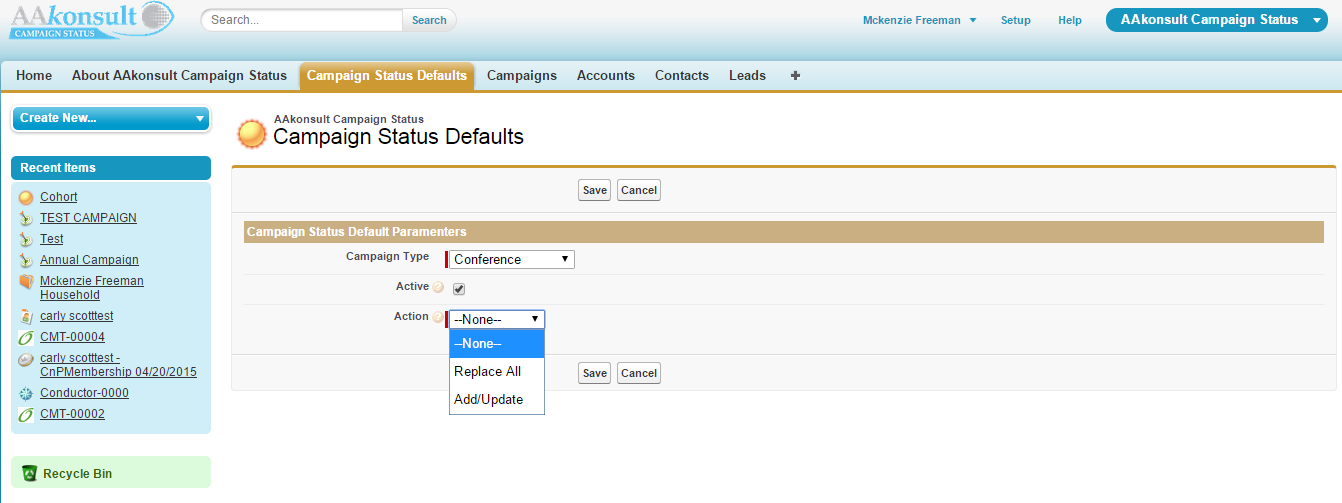
Select the Campaign Type that you want to add the Campaign Member Status’s to. *Please note, that the Campaign Type must exist prior to adding the status defaults.
Make sure the “Active” checkbox is checked.
And select which “Action” you’d like to take (Replace All status’s or Add/Update existing status’s).
Click “Save.”
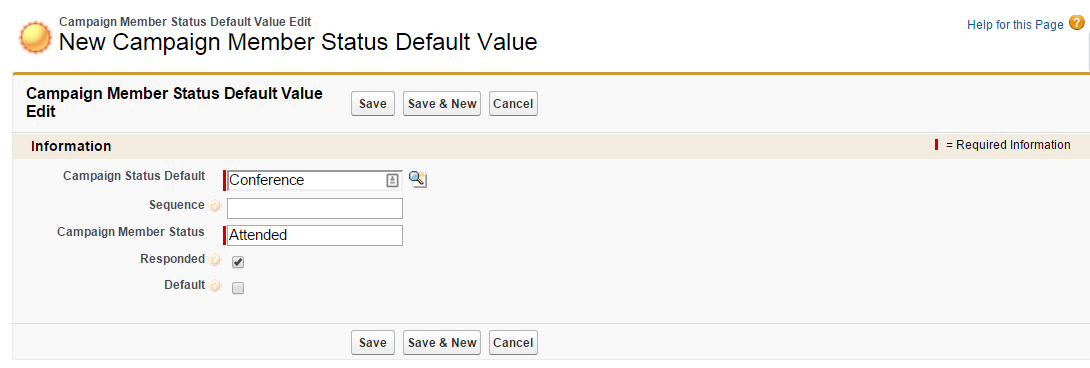
Select “New Campaign Member Status Default Value” to add the new values you’d like to use for your campaign.

The Campaign Type you have selected will appear in “Campaign Status Default.”
Enter a sequence number in which the order of the status’s will be applied. *Please note, the sequence order will only be applied to added status’s to the individual campaign, even if the action is Replace All.
Enter in your new value in “Campaign Member Status” and check whether this value should indicate that the member has “responded” and if this should be the “Default” value.
Select “Save.”
Repeat for as many Campaign Member Status values you need for each campaign type.
Now that you’ve added unique Campaign Member Status values for each campaign type, you will have much more effective reporting and can fully comprehend the impact of your campaigns.
Congrats!
