In a prior blog post about “How to Handle Memberships in the Salesforce Nonprofit Starter Pack,” we shared how to manually enter memberships into Salesforce, but what do you do if you have online memberships? Click & Pledge (C&P) a popular online donation tool that integrates excellently with Salesforce, can handle all of your online membership needs.
Click & Pledge enables organizations to accept donations, sell merchandise and accept memberships all online. The Click & Pledge administrative portal views Salesforce an extension of its portal. The integration posts data in real time to your Salesforce account with over 70 reports and 10 dashboards. 501Partners is a Click & Pledge official partner, which allows us to waive the $20/month fee for our clients, as well as reduce the transaction rate and cost.
In this blog post, we address some of the complexities of associating C&P online memberships with Salesforce. While this is a step-by-step explanation, it does assume familiarity with both C&P and Salesforce.
How to integrate Click & Pledge with Salesforce
Integrating Click & Pledge with Salesforce is standard, but some aspects may vary for each organization. For example, the type of opportunity record type created or how it looks up a contact in SF may differ. The Salesforce integration can be customized, based on an organization’s individual needs.
Follow these steps for seamless Click & Pledge integration with your Salesforce instance.
First, create a checkout page specific for memberships.
We’re able to create a checkout page specific for memberships and control what Salesforce opportunity record type gets created when a payment is submitted through Click & Pledge. When we create the specific checkout page for memberships and someone submits a membership payment, this creates a membership opportunity record for either a new or existing contact in Salesforce. (C&P also has the ability to look up whether a contact exists or not based on specified criteria. One may either attach the opportunity to an existing contact, or create a new one.)
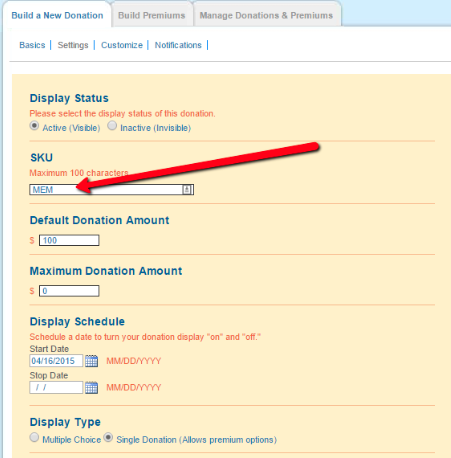
- Create a new membership page in C&P. Within the settings tab, set the SKU to equal “MEM” (for membership).
- Back in Salesforce, open up C&P settings and on the left hand side, you’ll see a tab that says “Opportunities.” Select that.
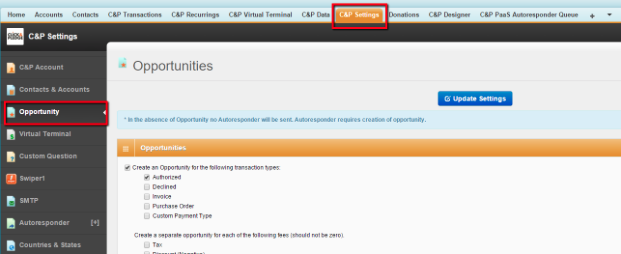
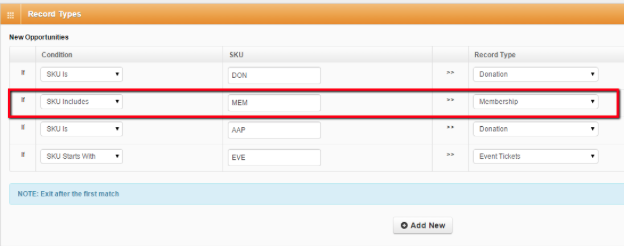
Scroll down until you see a section labeled “Record Types.” This is where you can control which opportunity record type C&P creates when an online donation or membership fee is submitted.
- Type in exactly what the red box highlights. This will account for all membership types. For example, if you have a platinum, gold and silver membership C&P pages, MEM can be the SKU for all of them and will use the membership record type.
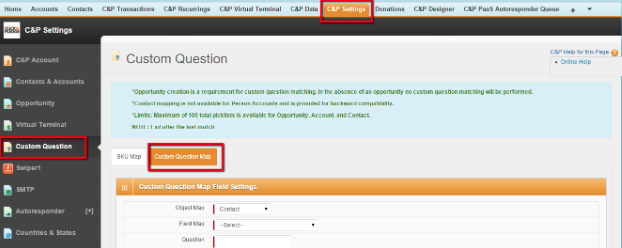
You can also use the SKU to fill in the Membership Start and Membership End Dates. Within C&P Settings, select Custom Questions, and then go to SKU Map.

For rolling start and end dates, you will enter this:

After you have set up your checkout page, you may create custom questions in a membership form and attach them to a membership page.
You may also create custom questions if necessary in the membership form for a user to complete, such as “How did you hear about us?”
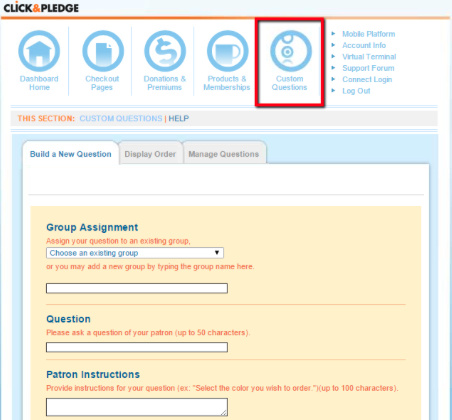
- First, login to C&P and select the custom question tab to add your own custom question and assign it which checkout page to display on.
- Back in Salesforce under C&P Settings, select Custom Questions (next to SKU Map) and map your question. Here is a C&P link that’ll help you with the mapping.
Attaching a membership payment through C&P to a specific Salesforce campaign.
If you are encouraging memberships through a specific campaign, we can link any opportunity that comes in on behalf of that effort to that Salesforce Campaign.
Where we entered in information about the membership record type, we can control to which campaign a membership attaches. Open C&P settings and on the left hand side, look for the “Opportunities” tab, and select it. Scroll to the very bottom and link the SKU to the Campaign ID.

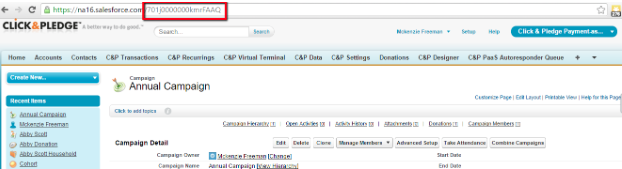
To get the Campaign ID, go to your Campaign in Salesforce and find the link in the URL:
Further notes: Membership continuity and Salesforce workflow rules
- The piece that may vary based on your organization’s memberships and what the Memberships Blog discussed, is handling the continuity of year to year data (making the end date of one year align with the start date of the next year’s membership).
- In addition to what Click & Pledge can do, we can also incorporate Salesforce workflow rules that automatically send out a reminder email when their membership end date is nearing.
Setting up the Click & Pledge integration may take a few hours, but once it is complete, your organization can automate online membership payments and renewals.
Your C&P data automatically feeds into your Salesforce account, where you can view your data. The Click & Pledge/Salesforce integration saves time in the long run, and offers any organization using it important membership and sales data needed to make decisions in real time.
