
Salesforce has been making noises since at least 2016 that the “Notes and Attachments” related list is not long for this world. With the Winter 2018 update, they are making good on this promise.
However, there’s no need to panic, as they are 1) allowing users to preserve all their existing notes and attachments; and 2) replacing “Notes and Attachments” with two full-fledged objects—“Notes” and “Files,” with the effect of vastly increasing the usefulness of these functions.
In this post I’ll be showing you how to activate and use the new objects and discuss the enhanced functionality, and in a follow up I’ll discuss tools for converting your old notes and attachments into new Notes and new Files.
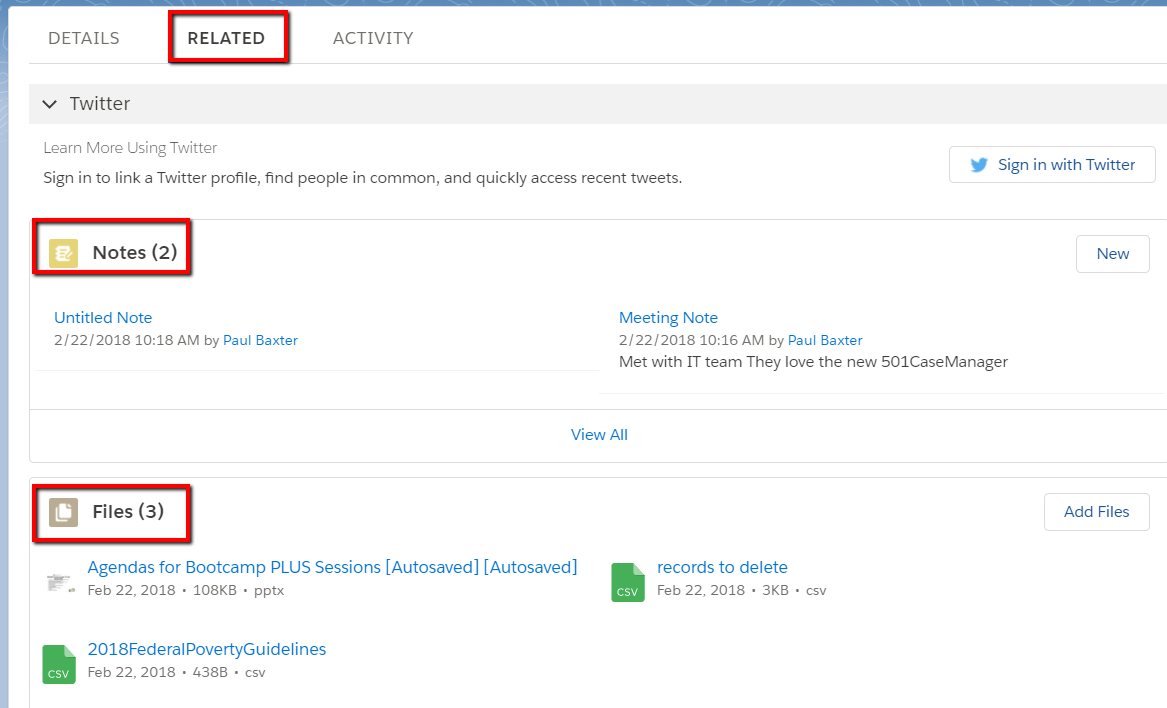
Note: the screenshots in this blogpost are based on Salesforce Classic. If you are a Lightning user, you should have Notes and Files already installed and visible:
So, you can skip over the last part of this post if you use Lightning.
Using Files and Notes
To create a Note:
- Simply click “New Note” from the Notes Related List:
- Add a Subject and type your note
- Use the formatting bar to format your text
- Sharing Settings allow you to specify who else can see your note

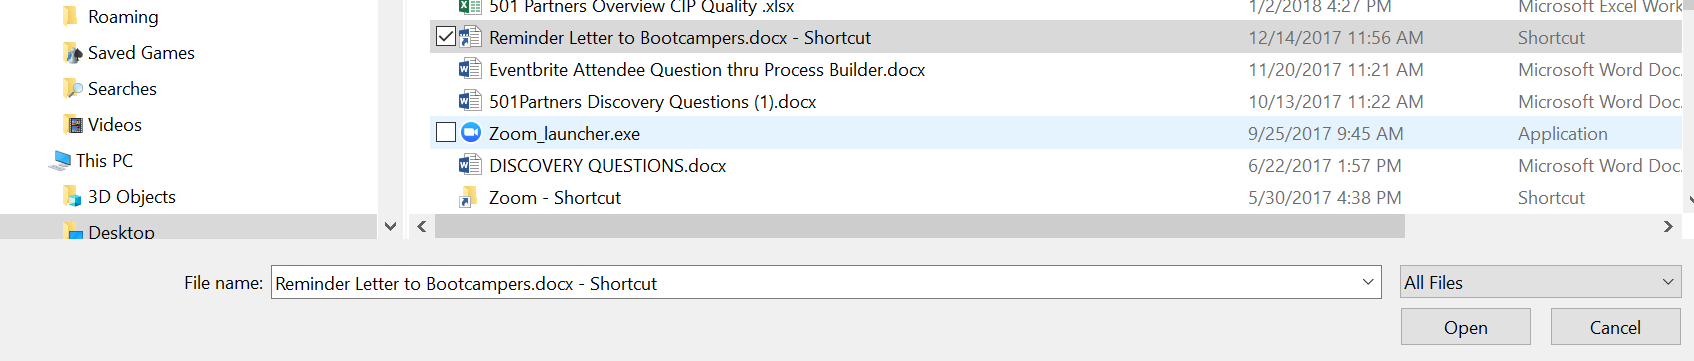
- To upload a File:
- From the Files related list click “Upload Files”
- You are immediately taken into your File Manager to select the desired File
- Click Open
- As with Notes, once you have uploaded a File you can Edit, Delete, or Share the document

Why You Should Use Notes and Files
There are a number of advantages to these new functions:
- You can create notes in rich text, meaning you can include formatting and editing
- You can upload multiple versions of the same file and not overwrite the previous
- You can share files right from within Salesforce
- You can integrate with external systems and reference copies of documents
However, the most significant improvement with Notes and Files is that they will now be accessible from anywhere inside your Salesforce account.
Right now, a note or attachment is only connected to a single record in a single object, even if it logically relates to multiple records. Let’s say you attach a document to an Opportunity. Months later you may want to refer to that document, but then you can’t remember where you attached it: To the Account? To a Primary Contact? It may take you some hunting before you find that document.
With Files, however, you will never have that problem. That’s because the File function has its own object that can reference every file in your Salesforce instance. That document you attached to the opportunity record is only a quick file search away.
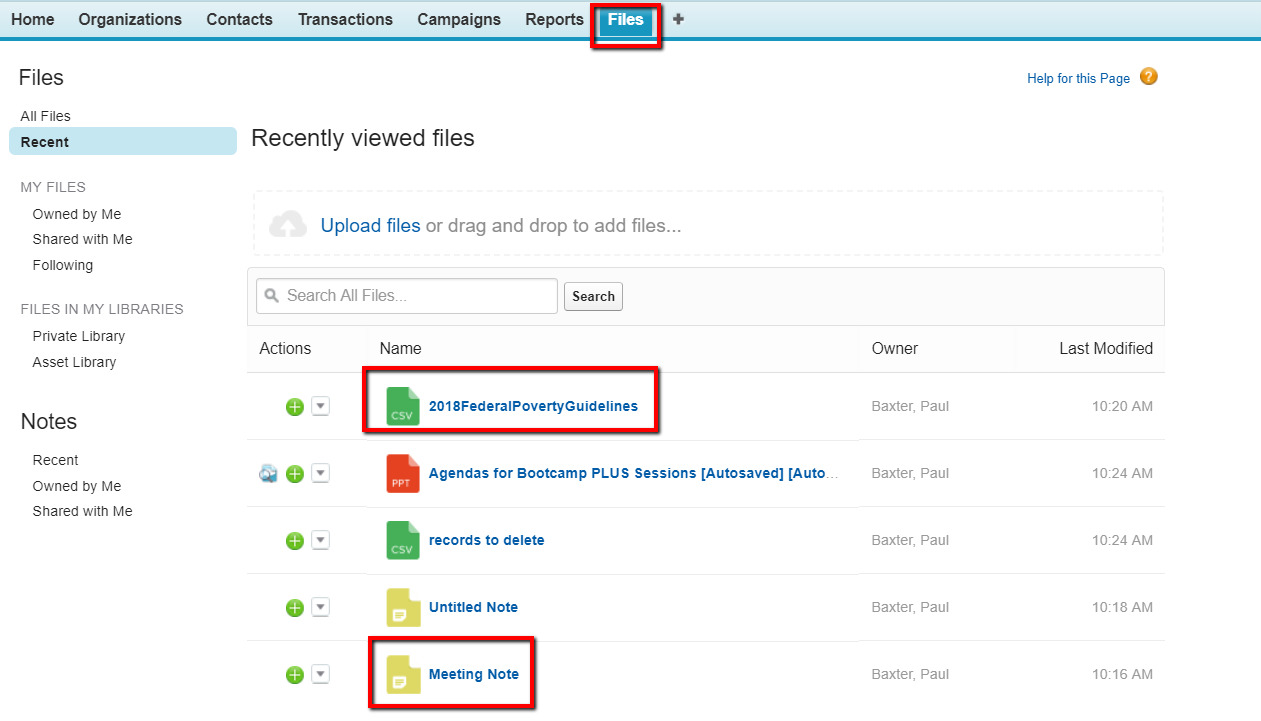
By adding the Files tab to your tab bar, it becomes easy to find any Note or File. If it is not immediately visible, you can search for it.
Making Notes and Files available to your Users
Notes and Files are already installed in your Salesforce, but they are below the surface. You simply need to unhide them. To do this takes two steps: First add the Files object to your users’ tab bar, and second, add the Notes and Files Related Lists to the Contact, Account, and Opportunity objects.
Adding Files to the Tab Bar
As with so much in life, there is an easy way to do this and a hard way, and likewise as with so much, the easy way often causes more problems than it solves. I’ll show you both.
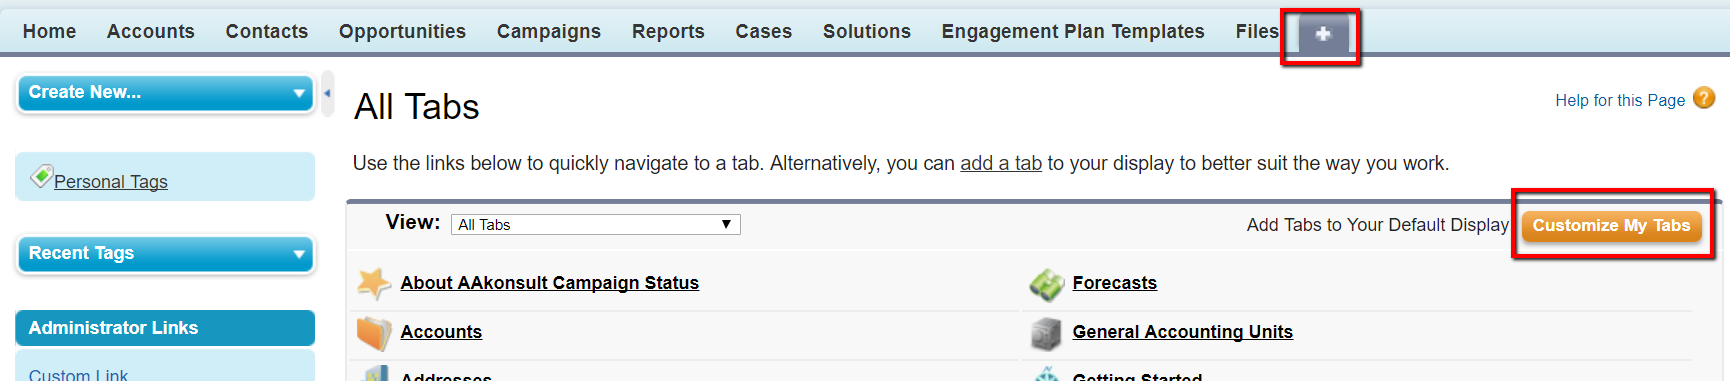
The Easy Way:
Any user can add a tab to their own tab bar by simply clicking the “+” sign and clicking the “Customize My Tabs” button. The problem is that this only affects one user.
The Hard Way:
So you have a choice: Instruct each user on how to add the tab and follow up with each one to make sure they’ve done it, or add the tab to everyone’s tab bar at the same time.
The tab bar is controlled by the confusingly named Salesforce “App,” which is indicated by the blue, capsule-shaped button on the upper right of the screen. If all your users are on the same App, you can easily add the tab. However, if you are using multiple Apps, you will have to add the tab on each one.
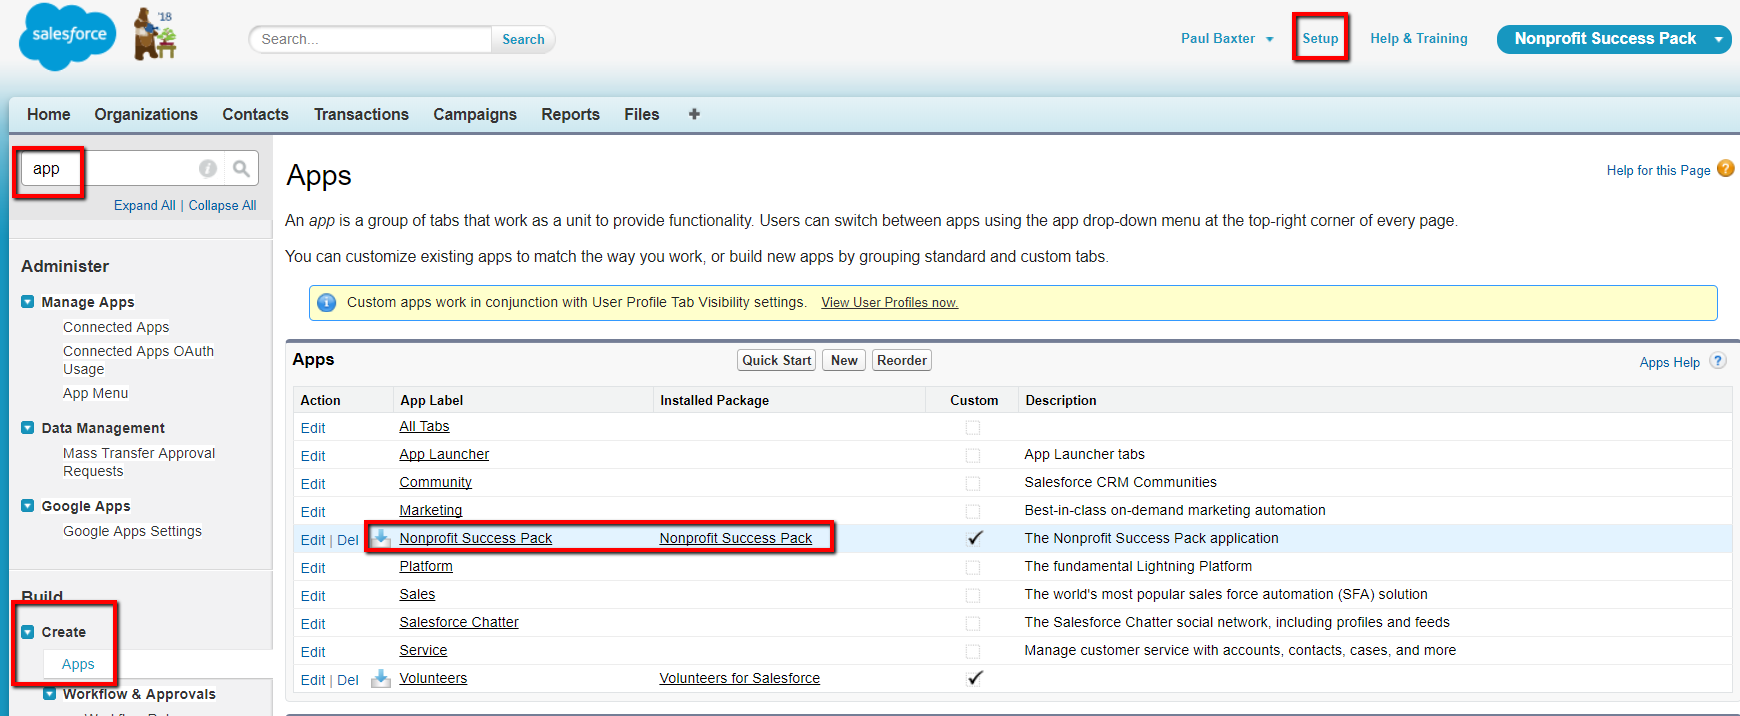
To edit the App:
- Click Setup
- Type “App” into the Quickfind
- Click the Create > App link
- Click on the link for the App you want to edit
- The App screen will open
- Click Edit
- Find Files in the Available Tabs window and use the “Add” button to move it to Selected Tabs
- Click Save
- Repeat for other Apps as necessary
Add the Notes and Files Related Lists to the Contact Object
- Open a Contact record
- Click the arrow to open the force.com menu
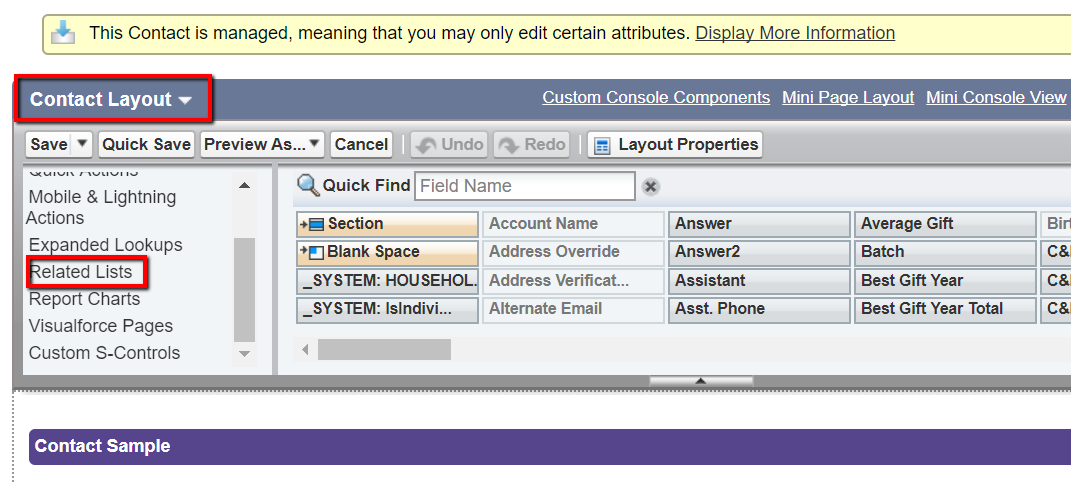
- Click Edit Layout
In the box in the upper left, scroll until you see “Related Lists” and select it
- Find the label for Notes and drag it onto the layout
- At the same time, you may want to find Notes and Attachments and drag it off so as to avoid confusion in the future
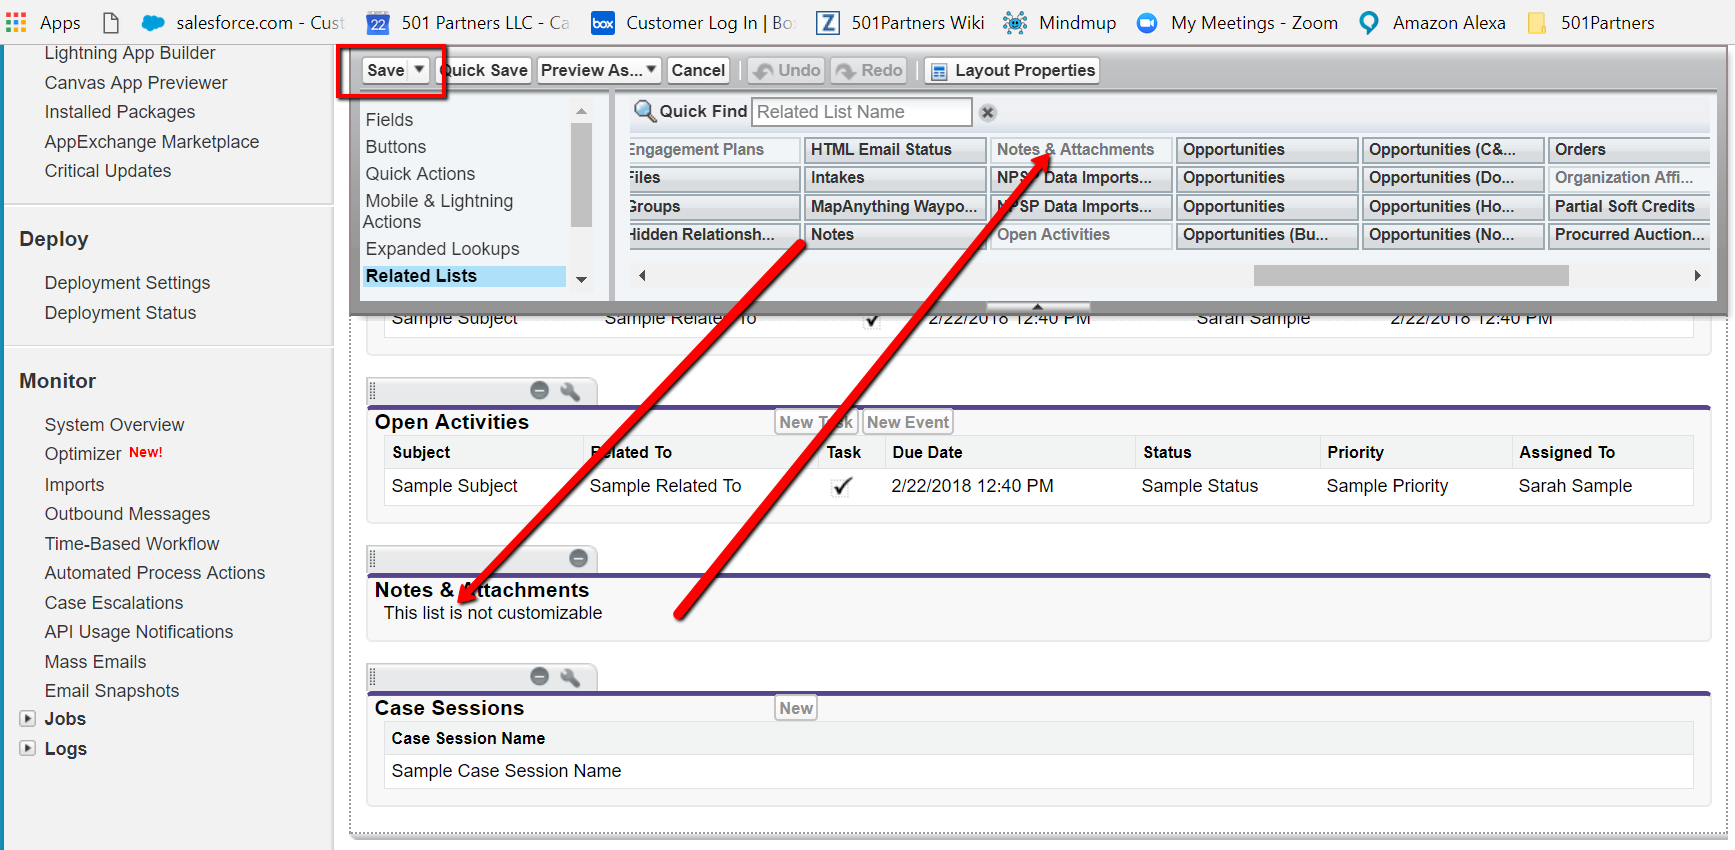
- Find the label for Files and drag it onto the layout
- Click Save
Once you have added Notes and Files to the Contact object, you can repeat the process on any other standard (and most custom) objects: Accounts, Opportunities, Cases, etc.
So, start Noting and Filing! In the next blog post,we’ll look at tools for migrating your existing Notes and Attachments into the new Notes and Files. In the meantime, for those of you who want to read ahead, here are some links to articles about these functions:
https://blog.brightsteppartners.com/2018/02/05/an-admins-guide-to-the-new-salesforce-files/
https://douglascayers.com/2017/05/08/convert-notes-to-enhanced-notes/
https://douglascayers.com/2015/10/10/salesforce-convert-attachments-to-chatter-files/
http://www.salesforceben.com/rip-notes-attachments-say-hello-to-files/
Read Part 2 of this blog.
